Lab-4-2
(1.67% of the course mark)
API testing using Postman
- In this lab, participants will dive into API testing using Postman, a powerful and user-friendly tool for building, testing, and documenting APIs. The lab covers essential API testing concepts, focusing on GET, POST, PUT, and DELETE methods, as well as working with headers, parameters, and request payloads.
Lab objectives
-
Gain knowledge of RESTful APIs and HTTP methods.
-
Learn to navigate the Postman interface, create and organize requests.
Postman API testing GET method
-
Open Postman and click on File >> New … >> HTTP Request.
-
Choose GET from the HTTP methods drop down list.
-
Enter this request url: https://jsonplaceholder.typicode.com/users and click on Send.
-
The API response should have a list of users, Capture a screenshot of the result (should look similar to image below) and name it: get-request-many-users.png.

-
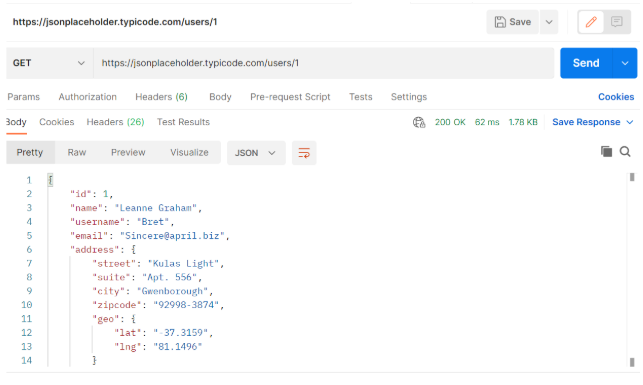
Choose GET from the HTTP methods drop down list.
-
Enter this request url: https://jsonplaceholder.typicode.com/users/1 and click on Send.
-
The API response should have one user, Capture a screenshot of the result (should look similar to image below) and name it: get-request-one-user.png.
JSONPlaceholder has other endpoints that you can use for mock api testing. For more information navigate to: https://jsonplaceholder.typicode.com/guide
Postman API testing POST method
-
Open Postman and click on File >> New … >> HTTP Request.
-
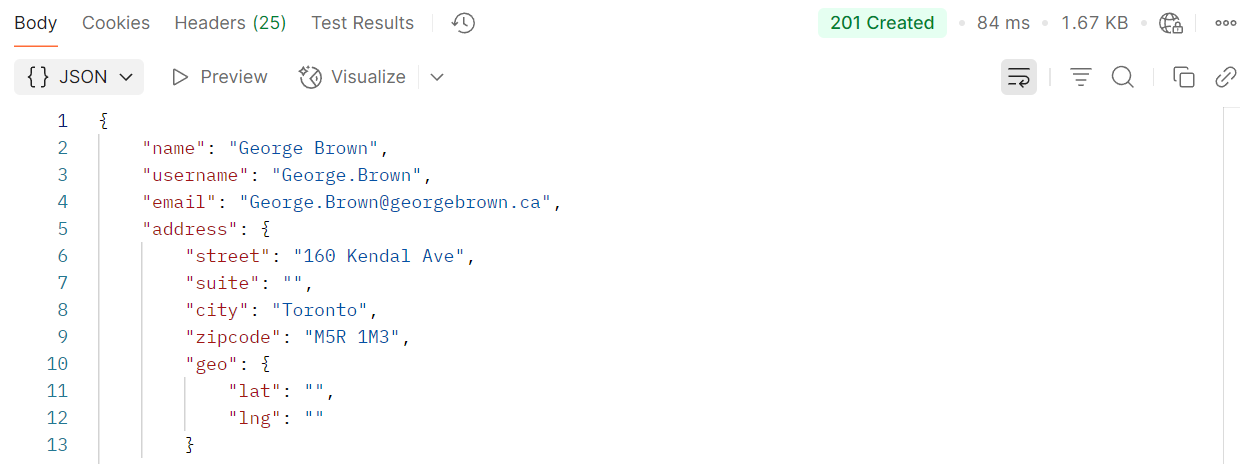
Choose POST from the HTTP methods drop down list.
-
Enter this request url: https://jsonplaceholder.typicode.com/users.
-
Click on Body, then click on raw and choose JSON from the drop down list.

- Copy and paste the json string below to the request body and click on Send.
{
    "name": "George Brown",
    "username": "George.Brown",
    "email": "George.Brown@georgebrown.ca",
    "address": {
        "street": "160 Kendal Ave",
        "suite": "",
        "city": "Toronto",
        "zipcode": "M5R 1M3",
        "geo": {
            "lat": "",
            "lng": ""
        }
    },
    "phone": "416 415-2000",
    "website": "https://www.georgebrown.ca/",
    "company": {
        "name": "George Brown College",
        "catchPhrase": "The City is our Classroom",
        "bs": "Learn by Doing"
    }
}
- This should create a new user, Capture a screenshot of the result (should look similar to image below) and name it: post-request-one-user.png.
Postman API testing PUT method
-
Open Postman and click on File >> New … >> HTTP Request.
-
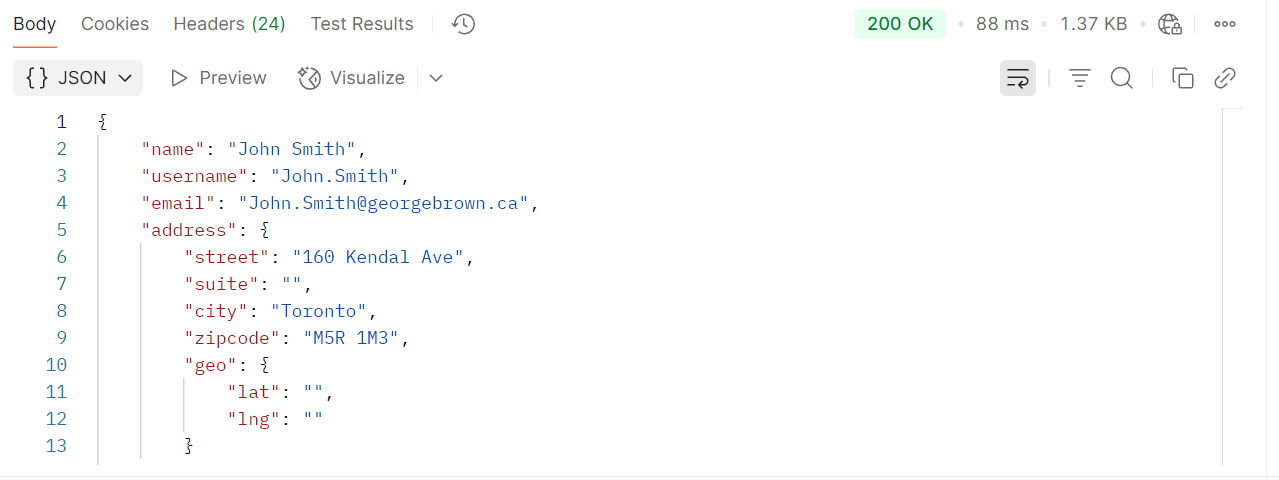
Choose PUT from the HTTP methods drop down list.
-
Enter this request url: https://jsonplaceholder.typicode.com/users/1
-
Click on Body, then click on raw and choose JSON from the drop down list.
- Copy and Paste the json string below to the request body and click on Send.
{
    "name": "John Smith",
    "username": "John.Smith",
    "email": "John.Smith@georgebrown.ca",
    "address": {
        "street": "160 Kendal Ave",
        "suite": "",
        "city": "Toronto",
        "zipcode": "M5R 1M3",
        "geo": {
            "lat": "",
            "lng": ""
        }
    },
    "phone": "416 415-2000",
    "website": "https://www.georgebrown.ca/",
    "company": {
        "name": "George Brown College",
        "catchPhrase": "The City is our Classroom",
        "bs": "Learn by Doing"
    }
}
- This should update userid 1, Capture a screenshot of the result (should look similar to image below) and name it: put-request-one-user.png.
Postman API testing DELETE method
-
Open Postman and click on File >> New … >> HTTP Request.
-
Choose DELETE from the HTTP methods drop down list.
-
Enter this request url: https://jsonplaceholder.typicode.com/users/1 and click on Send.
-
This should delete userid 1, Capture a screenshot of the result (should look similar to image below) and name it: delete-request-one-user.png.

Submission
-
Create a folder named submit.
-
Copy all (get-request-one-user.png, get-request-many-users.png, post-request-one-user.png, put-request-one-user.png and delete-request-one-user.png) the previously saved screenshots to this folder.
-
Create a zip file of this folder.
-
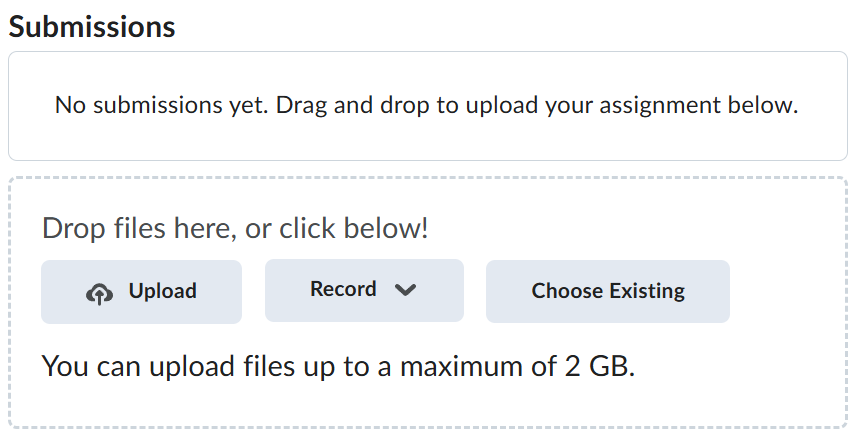
Navigate back to where the lab was originally downloaded, there should be a Submissions section (see below) where the zip file can be uploaded.